Exploring NestJS Workspace
Standard mode vs. monorepo mode
 Santosh Yadav Jan 3, 2020 3 min read
NestJS logo
In my previous article, we saw why and how to use NestJS, in this article, we will go through the NestJS workspace.
NestJS Workspace
NestJS supports two modes:
- Standard mode
- Monorepo mode
Standard mode
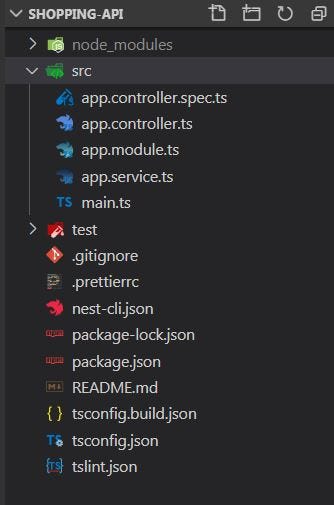
When we create a new application using nest new <app-name>, we are using standard mode. In standard mode, TypeScript’s tsc will be used as the compiler. Below is what our app looks like in standard mode.
Monorepo mode
A monorepo mode is where we have more than one application, generally, it’s one app and one library, we already have app, let’s add a library by using the below command. It will add a new library project.
nest generate lib shoppingLibNow, as we are in monorepo mode, rather than tsc, webpack will be used as a build tool. You can open the nest-cli.json and notice the below lines of code being added. compilerOptions has webpack value to true.
{ "collection": "@nestjs/schematics", "sourceRoot": "src", "projects": { "shopping-lib": { "type": "library", "root": "libs/shopping-lib", "entryFile": "index", "sourceRoot": "libs/shopping-lib/src", "compilerOptions": { "tsConfigPath": "libs/shopping-lib/tsconfig.lib.json" } } }, "compilerOptions": { "webpack": true }}And after adding a library, the app structure will look like below:
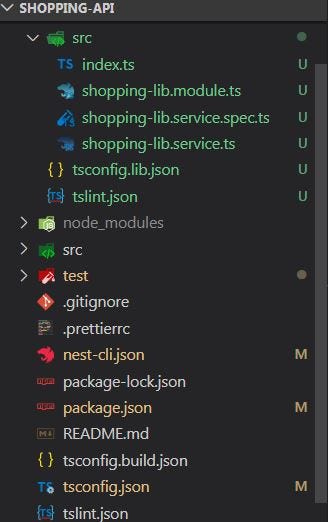
monorepo
Let’s go through some important files:
tsconfig.json: The configuration file to be used while runningtscto transpile your files.nest-cli.json: The Nest CLI config file has a list of projects when we are in monorepo mode, and defines which build tool we are usingwebpackin monorepo and by default it’stsc.main.ts: This is the entry file for our NestJS application and has abootstrap()function to bootstrap our app. By default, the server runs on port 3000, you can change it and while using it in production, we can use an environment variable.app.module.ts: This is our root module which has registered all modules, controllers, services.app.controller.ts: Our application should have at least one controller defined and this is our default controller.app.service.ts: We can have multiple services in our application. This is a sample service added as a part of the workspace, this is optional.Libraries: Libraries can have reusable code like service, pipes, guards, or interceptors.
Tool for a Full-Stack App With NestJS
If you are building a full-stack application with Angular/React.js and want to use NestJS as a back end, you should consider Nx Dev Tools which provides a lot of features.
Conclusion
We learned about the NestJS workspace and two modes that are available and how they differ, and how we can convert our workspace to monorepo mode.
We also saw different files, which are important, and why they are useful. In the next post, we will discuss controllers and how we can create and configure endpoints.