NestJS Controllers Deep Dive
Explore the controller; the most important part of NestJS
 Santosh Yadav Jan 6, 2020 6 min read
NestJS Logo
In this blog post, we will explore the controller which is the most important part of NestJS.
Why We Need Controllers
Controllers are responsible for handling requests sent to the server, controllers expose multiple endpoints where clients can send the request. Each endpoint is identified by an HTTP method also known as HTTP verb.
HTTP verbs
- GET: The GET method is to get the data from the server, it can be a single record or multiple records. We can also pass some params which can be used for filtering the records.
- POST: The POST method is used when we want to create some records in the database. We can also use POST requests in cases where we want to filter some records based on information sent to the server, for example, providing an advanced filter.
- PUT: The PUT method is used to update the records in the database. In
Putthe method we expect that whatever data we are sending will be updated. - PATCH: The PATCH method is used when we only want to modify not replace all the values in the database.
- DELETE: The DELETE method is used when we want to delete some records from the server.
HTTP status code
Another thing that you have to be aware of is HTTP status codes. You can refer to the Mozilla docs for the list of status codes. The POST method returns 201 as status code in success, other methods return 200 as status code.
Creating Our First Controller
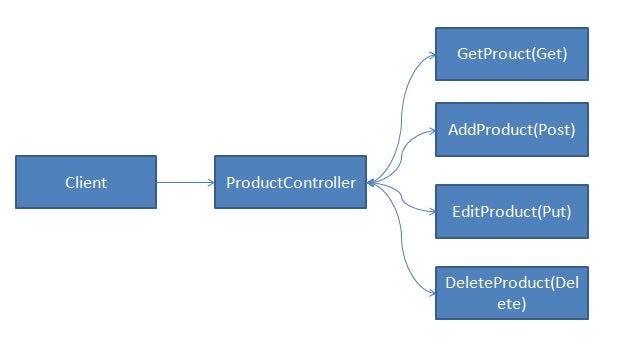
The above image shows a ProductController which will take requests from the client and the request is handled by one of the endpoints/methods defined. An HTTP method can receive an HTTP request and return an HTTP response in the form of JSON, XML, files, or text.
To create a controller, we can use the Nest CLI, in our app we already have one controller available, we will create a new one called product, run the below command to create.
nest generate controller product -p defaultThe -p flag will make sure the controller is created in the default app, otherwise, you can pass the name of the product where you want to create the controller.
Once the command is executed, you will notice two new files.
- product.controller.ts
- product.controller.spec.ts (for unit testing)
We need to write our code in product.controller.ts. If you open this file, as of now, you will find the below code.
import { Controller } from '@nestjs/common';@Controller('product')export class ProductController {}@Controller: The controller decorator is appended over theProductControllerclass. If you are coming from a .Net or Java background then you have used one while creating web APIs. It takes one parameter where you can pass the endpoint where the request can be sent.
Adding Our First Method
Let’s add our first Get method which will return a list of products. We will create a dummy list of products, we will see database integration in one of the upcoming articles.
Open product.controller.ts and add the below code:
import { Controller, Get } from '@nestjs/common';@Controller('product')export class ProductController { products = [ { id: 1, name: 'One Plus 7', price: 48000 }, { id: 2, name: 'I Phone X', price: 64999 } ]; @Get() GetProducts() { return this.products; }}The highlighted code is what we have added to create our Get method.
@Get: The Get decorator here specifies that when a client sends a request at[https://endpoint](https://endpoint)/productwith theGetHTTP method,GetProductswill be called.
Go ahead and test it. Start the server using the npm run start:dev command which will run our server in watch mode and will detect changes whenever we make any in our code.
Enter [http://localhost:3000/product](http://localhost:3000/product) in your browser, get calls can be triggered via the browser.
Add Post Method
The highlighted code is added for the Post method and the rest of the code remain the same.
import { Controller, Get, Post, Req } from '@nestjs/common';import { Request } from 'express';@Controller('product')export class ProductController { products = [    { id: 1, name: 'One Plus 7', price: 48000 },    { id: 2, name: 'I Phone X', price: 64999 } ];@Get() GetProducts() {   return this.products; }
@Post() AddProduct(@Req() req: Request) { this.products.push(req.body); return req.body.id; }}@Post: The Post decorator is to define the methodAddProduct. It will be initiated by a client when a request is made to[https://endpoint](https://endpoint)/productwith the Post method. Post methods cannot be initiated by using the browser, we need a client, I use Postman for testing.@Req: We can get access to the HTTPRequestobject. You can get access to body, headers, and other request parameters.
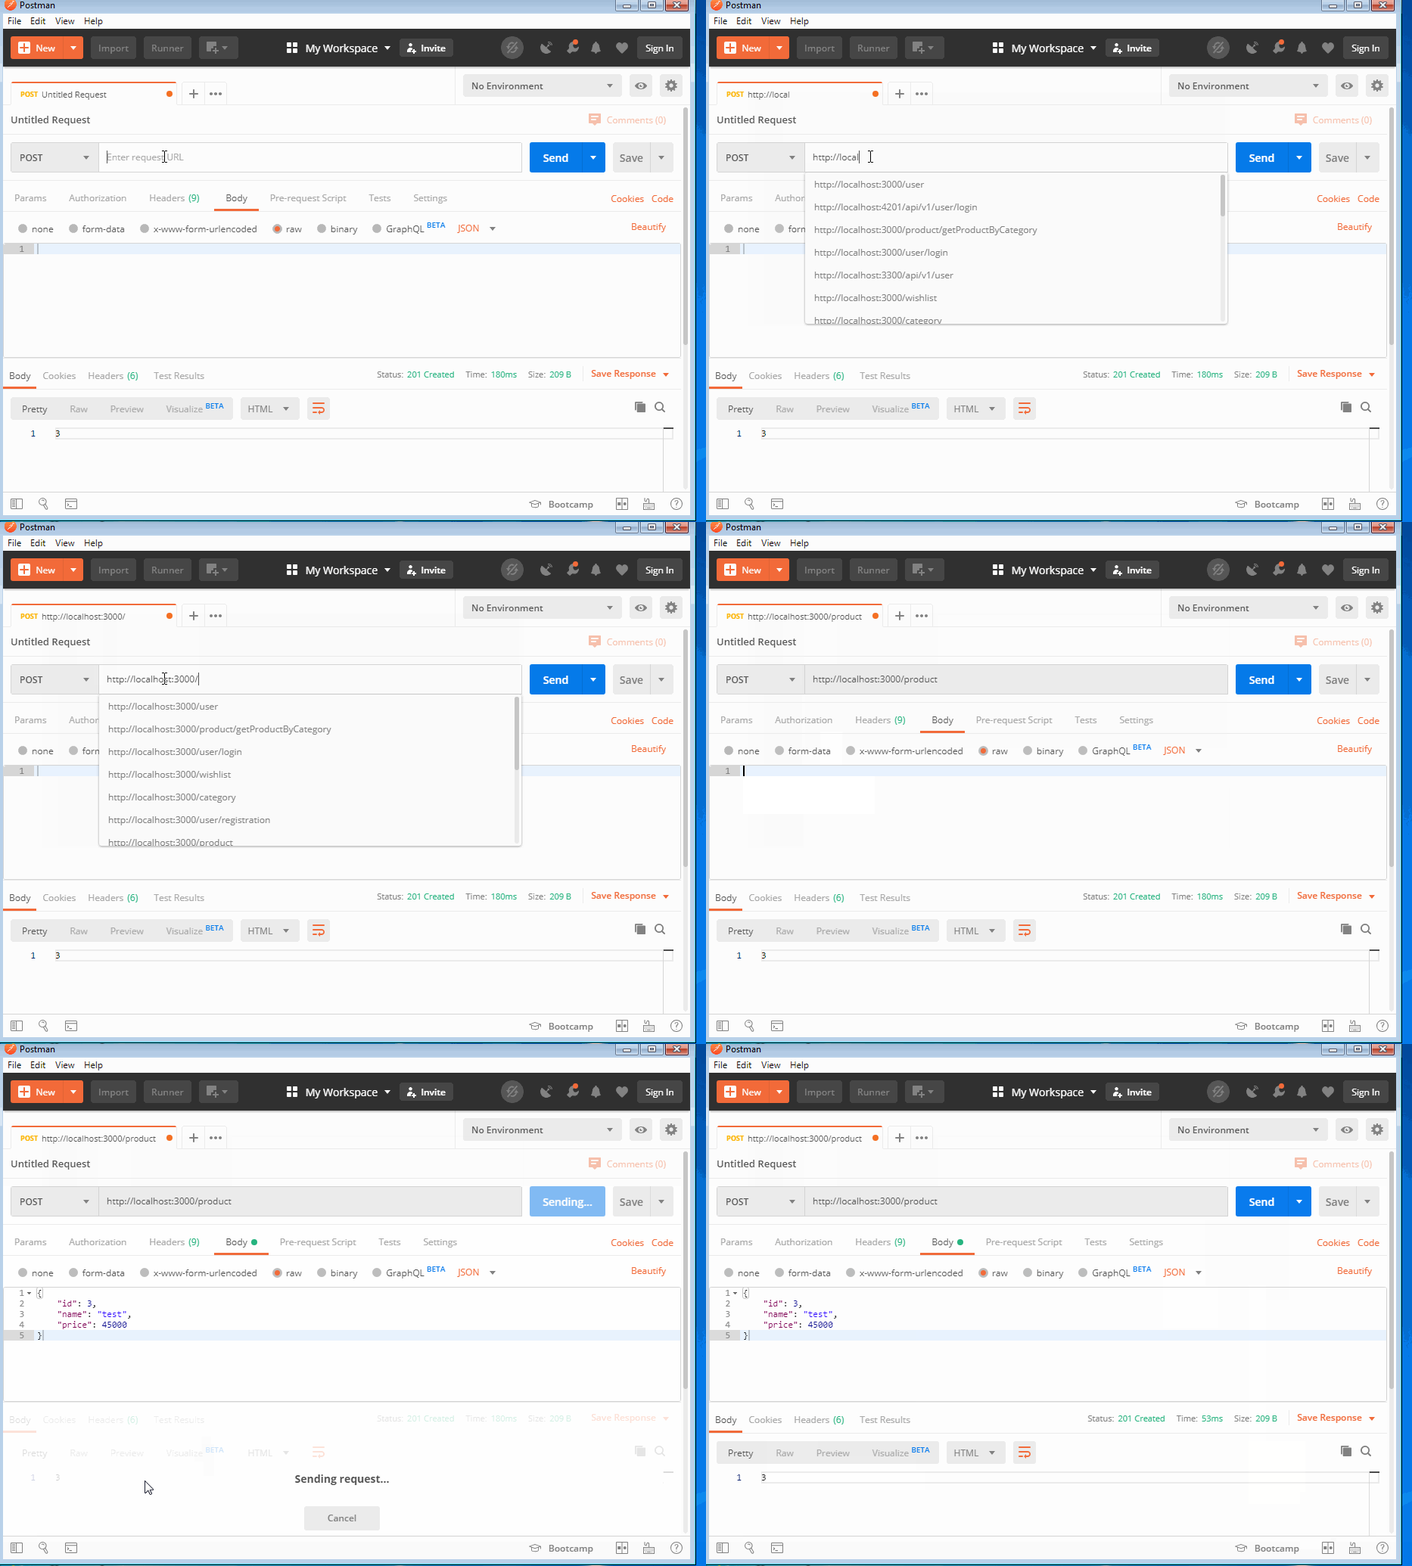
You can see how we provide the endpoint, the method was post and we sent some data in the body and we received the id value as a response.
Other Decorators
For Put, Patch, and Delete we have @Put, @Patch, and @Delete decorators available. We will see the examples for each one when we integrate the database.
@Put()EditProduct(){}@Patch()UpdateProductPrice(){}@Delete()DeleteProduct(){}Overriding Response and Headers
We may need to override the status code or create response data in the form of JSON, we can achieve this using the @Res() decorator, let’s modify the AddProduct method to use it.
import { Res } from '@nestjs/common';import { Response } from 'express';@Post() AddProduct(@Req() req: Request, @Res() res: Response) { this.products.push(req.body); // return json data with default status code return res.json({ id: req.body.id}); // to update the status code //return res.status(205).json({ id: req.body.id});}If we just want to override the status code, it is possible using the @HttpCode decorator.
@Put()@HttpCode(204)EditProduct() {}To add custom headers to the response, we can use @Header decorator.
@Put()@Header('header-key','value')EditProduct() {}Overriding Route Name and Creating Dynamic Route
We can provide friendly names to our routes and even make changes to generate a dynamic URL for each request.
@Put('editProduct')EditProduct() {}After making changes, the endpoint will be [https://endpoint](https://endpoint)/product/editProduct.
@Put('editProduct/:id')EditProduct() {}@Get(':id')GetProducts() {}In the above scenario, the :id is a dynamic value that the URL can accept. For example, [https://endpoint](https://endpoint)/product/editProduct/1, where 1 is the value for :id
Accessing Router Params
We can also access the params passed to a dynamic route using the @Param decorator. In the below example, we have a new method, GetProductById, where we are getting the products from the array by id parameter.
@Get(':id')GetProductById(@Param() param: number) { return this.products.find(p => p.id === +param.id);}Using Async With Our Actions
There may be times where you may want to use async actions, mostly while using promise or observables. You can achieve the same by using the below syntax.
@Get()async getProducts(): Promise<any[]> { return [];}@Get()async getProducts(): Observable<any[]> { return of([]);}We will see some more examples of async actions in upcoming posts.
Registering Controllers
Controllers need to be registered with NestJS modules, If you are using the NextJS CLI, this will be managed by the CLI, you don’t need to do it manually.
If you open app.module.ts, you will see the below code.
import { Module } from '@nestjs/common';import { AppController } from './app.controller';import { AppService } from './app.service';import { ShoppingLibModule } from '@app/shopping-lib'import { ProductController } from './product/product.controller';@Module({imports: [ShoppingLibModule],controllers: [AppController, ProductController],providers: [AppService],})export class AppModule { }Conclusion
In this post, we learned about controllers and why and how to use them and learned about different decorators.